A Live Photo isn’t one frame — it’s roughly three seconds of your life, sound included, wrapped around the moment you hit the shutter. That’s the whole appeal. Trouble is, the raw version rarely looks as good as it felt in the moment. Dim lighting, a blink, a random noise in the background — small things, but they add up. So if you typed “how to edit live photos” into Google hoping for a straight answer, here it is.
We’ll go through what’s already sitting on your phone for free, a couple of apps worth the download, and a few tricks that photo editing studios use on client work every single day. It doesn’t matter if you’re just cleaning up a vacation clip or prepping product shots for an online store — by the time you finish reading, editing a Live Photo won’t feel like guesswork anymore.
What Are Live Photos
Apple introduced this a while back, and by now it’s just part of how an iPhone camera works. Tap the shutter, and your phone quietly grabs 1.5 seconds before that moment and 1.5 after. Put together, you get a short looping clip with sound — not quite a video, not quite a photo, somewhere in between.
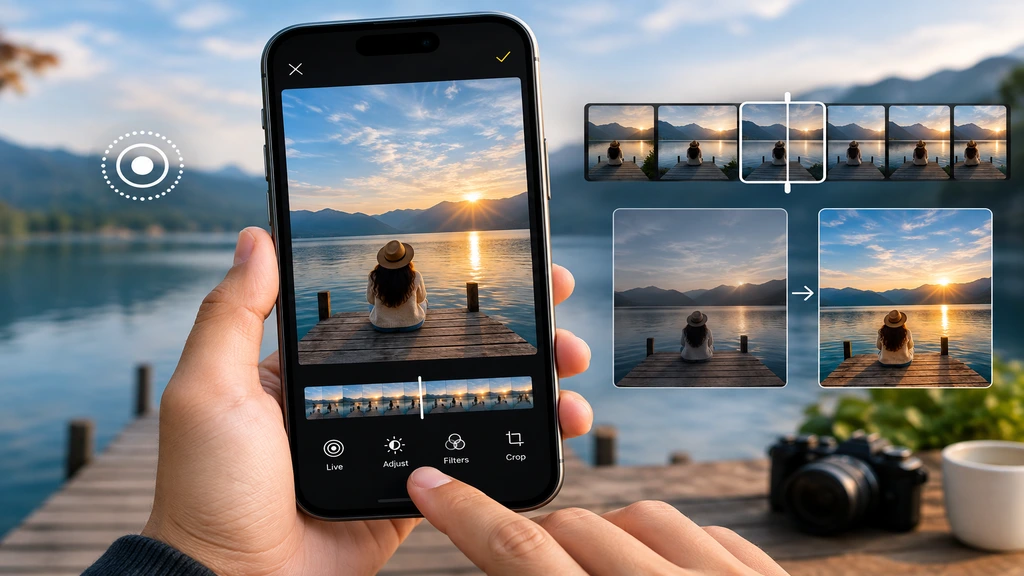
Look for the little circular icon with rings in the top-left corner of the screen — that means Live Photo mode is switched on. Press and hold the image later in your gallery and it plays that window back. Neat on its own, but here’s the part people miss: it also means you get editing choices a still photo never had. You can pick a different key frame. Trim the clip shorter. Drop in an effect like Loop or Bounce. Mute whatever noise got picked up.

Why Edit Live Photos
Why not just leave it as-is? A few reasons keep coming up.
- The exact second you tapped isn’t always the best one — sometimes the frame right before it is sharper, or someone’s actually smiling in it and not mid-blink.
- Motion pulls the eye away from what actually matters in the shot, which is a real problem for product photos and portraits especially.
- Background noise. Wind, traffic, someone talking nearby — none of it adds anything, and most of the time it’s worth cutting.
- The effects genuinely change how a photo feels. Loop and Bounce in particular tend to be the kind of thing people stop and watch twice.
For a business page or an online store, this stopped being optional a while ago. A well-edited Live Photo is just part of looking credible online now.
Best Live Photo Editing Tools
None of this requires expensive software, for what it’s worth.
- Apple Photos — already installed, no setup needed. Covers trimming, key-frame changes, and the built-in effects without much fuss.
- Adobe Lightroom Mobile — more control once you’ve settled on a frame. Color, exposure, cropping, all in one place.
- Snapseed — free, and it punches above its weight on brightness and sharpness tools.
- VSCO — best if your goal is a consistent look across your whole feed rather than a single edit.
- A professional editing team — makes sense for eCommerce work, where backgrounds, colors, and consistency across dozens of images matter more than any single app can guarantee.

Edit Live Photos on iPhone
Most people start here, so let’s cover Apple’s own method first.
- Open Photos and select the Live Photo you want to fix up.
- Swipe up on the image — the editing row shows up underneath.
- Tap “Effect” and pick between Live, Loop, Bounce, or Long Exposure. Loop just repeats the clip on a loop, Bounce plays it forward then back, and Long Exposure merges the frames into that soft motion-blur look.
- Tap “Edit,” then drag the white circle under the filmstrip to change your key photo. The frame you originally tapped is almost never the sharpest one — worth checking a couple of frames on either side.
- Trim it down using the yellow brackets on the same filmstrip.
- Need it silent? Tap the speaker icon while you’re in edit mode.
- Adjust exposure, brilliance, highlights, shadows, contrast, and saturation under “Adjust,” same as any other photo.
- Tap “Done.” That’s it — the edit’s saved and ready to send or post.
Takes under a minute, honestly, once you’ve done it a couple of times.
Best Apps for Live Photos
Apple’s own tools handle the basics. Third-party apps give you room to actually push further.
Lightroom Mobile will let you save a Live Photo as a still and then run presets, curve adjustments, and selective color work — none of which the built-in app offers. Snapseed’s Selective tool is worth knowing about too; it brightens just a face or a product without blowing out the rest of the frame. VSCO’s more about mood than correction, so treat it as the filter layer rather than the fix.
Bulk editing changes things, though. Fifty product photos or a full event gallery, and suddenly a mobile app feels painfully slow. That’s usually the point where it’s worth handing the work to a professional editing service instead — background cleanup and color matching across dozens of images just isn’t a phone-app job anymore.
Each app really does have its own lane. Lightroom for consistent color grading across a whole batch. Snapseed for a quick one-off fix when you’re out and about. VSCO for a look, not a correction. Pick based on the job in front of you rather than trying to make one app do everything.
Common Editing Mistakes
Even a “quick” edit goes wrong sometimes. A few things worth double-checking.
- Defaulting to whatever frame you happened to tap, instead of scrolling the filmstrip to find the sharpest one available.
- Pushing saturation and contrast too far — past a certain point it stops looking rich and starts looking off.
- Leaving background noise untouched when it clearly doesn’t belong in the shot.
- Skipping the crop entirely. A cluttered background does more damage to a photo than people realize.
- Forgetting how much storage Live Photos actually use. Converting to a still or compressed clip helps a lot if you’re posting online.

Quick Editing Tips
Small habits, but they genuinely add up over time.
- Good lighting beats good editing, pretty much every time — there’s only so much a dim, blurry shot can be rescued.
- Hold the phone steady through that whole 1.5-second window, both before and after the tap.
- Bounce suits anything with energy — kids, pets, that kind of movement.
- Long Exposure works surprisingly well on waterfalls, traffic trails, city lights at night.
- Keep the original file before you start editing. Nothing worse than wanting to redo something and realizing you can’t.
Best Editing Settings
There’s a sensible order to all this, and following it saves time.
- Start with exposure. A properly exposed shot needs far less fixing everywhere else.
- Go easy on contrast — a touch adds depth, too much and you lose detail in shadows or skin tones.
- White balance matters more than people think. Indoor lighting skews yellow or blue more often than not, and a quick fix brings everything back to natural.
- Sharpen last. Do it too early and you end up exaggerating noise instead of detail.
- Export at full resolution. Compressing early costs you detail you might want later, especially for print.
Same order applies whether it’s one photo on your phone or fifty for a client.

Hire a Professional Editor
There’s a real gap between touching up a personal photo and prepping product images for a store or an ad campaign. Backgrounds need to stay clean across every shot. Shadows have to look natural, not pasted on. Colors need to match from image to image, sometimes across a batch of hundreds. That’s not really a phone-app task — it takes a trained editor and the right software.
If your Live Photos or product shots need a clean, distraction-free background, a background removal service handles it quickly and keeps everything consistent across your whole catalog — ready for your website, marketplace listings, or ad campaigns. Small detail, but it changes how finished the final images actually look.
Conclusion
Once you’ve got the basics of how to edit live photos down, there’s more room to work with than most people expect — the right key frame, an effect that actually fits the moment, colors that look natural instead of forced. The Photos app covers most everyday needs on its own, and Lightroom or Snapseed step in when you want more control. And when consistency across dozens of images matters more than a single great shot — product photography for a store, say — bringing in a professional editor saves time a phone app just can’t. Start simple, get comfortable with the basics, and the results keep improving from there.
PakarPBN
A Private Blog Network (PBN) is a collection of websites that are controlled by a single individual or organization and used primarily to build backlinks to a “money site” in order to influence its ranking in search engines such as Google. The core idea behind a PBN is based on the importance of backlinks in Google’s ranking algorithm. Since Google views backlinks as signals of authority and trust, some website owners attempt to artificially create these signals through a controlled network of sites.
In a typical PBN setup, the owner acquires expired or aged domains that already have existing authority, backlinks, and history. These domains are rebuilt with new content and hosted separately, often using different IP addresses, hosting providers, themes, and ownership details to make them appear unrelated. Within the content published on these sites, links are strategically placed that point to the main website the owner wants to rank higher. By doing this, the owner attempts to pass link equity (also known as “link juice”) from the PBN sites to the target website.
The purpose of a PBN is to give the impression that the target website is naturally earning links from multiple independent sources. If done effectively, this can temporarily improve keyword rankings, increase organic visibility, and drive more traffic from search results.